In case you missed my last post, while I was visiting my parent’s beach house this summer, we set out to give the house a little refresh. And since it was basically my idea, I wanted to make sure I kept it on a budget. (Nothing like spending your parents money LOL.) We were able to spruce up the house for around $170 and I am sharing the updates with you here!
I already shared how we transformed the dining room into a new serene family friendly living space. Today I am going to share where the existing dining room table landed to create a bigger eat-in kitchen area.

Can you believe this beautiful table was hiding in the other separate room all this time? Now when you walk in the front door, you are greeted by this welcoming table! Once the table was in here, I wanted to find some larger chairs to cap off the ends. Would you believe we found this pair of cane back chairs for $8? And yes, that is for the pair, so only $4 a piece! We plan to recover them but there wasn’t a staple gun at the beach house so Mom will tackle that project next time she goes down. For now you can see that we plan to use the same fabric from the DIY curtains on the seat covers.

Speaking of the curtains, I brought this big piece of fabric down with me that I had picked up at the thrift store for a couple bucks months ago. I wasn’t sure if it would be put to use, but I loved it and it’s subtle coastal feel. It ended up coming in handy and we had enough to make 3 curtains, cover two chair seats, cover two foot stools, and make a table runner.
It is a pretty linen material with subtle coastal blue stripes.

The best part is that the sides of the fabric had a pretty fray which made it really easy to make these as no-sew. But of course, if we come across something better fitted, it will be easy to change these out.

The art is a framed poster of the nearby inlet that we framed in an old black frame.

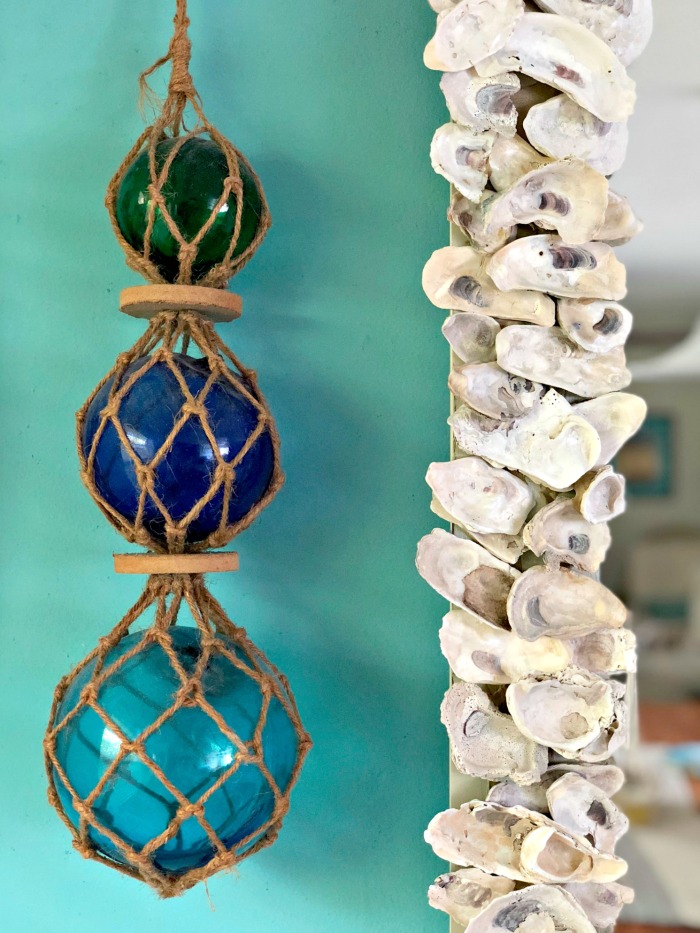
Now let’s talk about the built in console wall with the bold aqua accent wall. We just rearranged what was hanging and added that show stopping DIY oyster mirror! Which by the way, cost us less than $10 to make.


There are still a few things to figure out in here. The light fixture is now not centered and a little small for the table so we are brainstorming ideas for this. Mom is also going to be on the hunt for a few different chairs to go around the table.

And because we all love a good before and after, here is what this area looked like before. You can see how it had a smaller table with only enough seating for 4.

And here is the after! Now there is enough seating for 8 which really suits this family beach house well! Oh and since there is literally never a minute there wasn’t someone sitting at the table, I figured I would just embrace that sweet face. Everyone say hi to Sweet B!

Room Sources:
Linen Grain Sack Fabric
Mermaids Welcome Brass Sign
See all of the beach house refresh updates here:
Beach House Refresh Part 1
Beach House Refresh Part 2
Beach House Refresh Part 3
Beach House Refresh- DIY Oyster Mirror
Beach House Refresh- DIY No-Sew Burlap Drapes
Beach House Refresh- DIY Latitude & Longitude Sign
xoxo-
Heather


Looks awesome!
Thanks! Gotta love the group effort! And the SCORES we found!
Please share how to post on oyster mirror.
Yes! I will definitely share a tutorial! Thanks.
Love it Heather, looks awesome and actually less crowded with the bigger table!
Wow! What a transformation! Loved both posts and rooms!